|
|
In this tutorial you will learn how the power of Emacs can be used to edit complex Websites, that is to say Websites with many files and folders in them. For the purposes of this tutorial, the command Ctrl-f is the most important as it enables you to edit more than one file or folder at the same time. Pressing Ctrl-f brings up a message at the bottom of your Emacs window like so: Find File/Folder:. Beside this prompt is a flashing green cursor. At this point you can edit the name of the file or folder that you wish to open in Emacs. The following information will help you at this point:
You can open files or folders from an absolute location like c:/. However if you are logged onto a school computer it is unlikely that you can save files in this folder as it requires administrator privileges.
You can also open files or folders from a relative location. For example opening ~/stuff opens the file or folder stuff in Emacs. Emacs and UNIX use the notation ~/ to refer to your home folder. Your home folder is a place for you to put your own files, i.e. files that you edit. For the user Davin Pearson (me) the location of the home folder (~/) is most likely something like: c:/Documents and Settings/Davin Pearson/My Documents/.
The Left / Right cursor keys and the Backspace and Delete keys all work as they are supposed to.
The Tab and Space keys provide Auto Completion and when used cleverly can save you a lot of extra typing. For example typing ~/.e and pressing the Tab key results in the file name ~/.emacs showing up in the window at the bottom of the screen, assuming that .emacs is the only file starting with .em in your home folder. If more than one possible completion of the initial fragment is possible, then you will be presented with a menu called *Completions* of possible completions.
The cursor keys Up and Down scroll through your Command History of the Ctrl-f commands. For example if you opened the file ~/.emacs a few minutes ago then pressing the following key sequence Ctrl-f Up Up . . . will eventually come up with ~/.emacs without you ever needing to type it in a second time.
The action that Emacs takes when you have selected a file depends on the suffix-extension of the file and whether or not the given name is a file or a folder. Graphical files (BMP, GIF, JPG and PNG) are opened in the graphics program IrfanView (see Section § 2.6). Other types of files are opened in Emacs's text editing mode and folders are open into Emacs in what is called Dired Mode, where DIRED is short for DIRectory EDitor, and directory is Emacs/UNIX terminology for folder. In Dired mode, you can view all of the files in the given folder with the following syntax highlighting:
archive files are shown in bold light red,
graphics files are shown in bold light magenta,
Web files are shown in bold with yellow background and
unimportant and backup files are shown in grey
In Dired mode, the following key bindings are in effect:
Pressing the cursor keys Up and Down moves the cursor up and down to select a file or folder.
Pressing Enter on a file or folder has the same effect as if you had chosen that file or folder using Ctrl-f.
Pressing the z key while over a graphical file opens that file in MS Paint (see later Section § 2.10).
Pressing the . (full-stop) key launches Windows Explorer with the current folder as the same as the one that you were editing in Dired mode. This is useful for interfacing with Windows applications.
Question 2.1: Unzip the archive file webdesign-tutorial-02.tar.gz using Winzip or the tar command for the purposes of completing this tutorial.
. Then download the following images: New-Zealand.bmp, seanpool.bmp, carrot.jpg and Amiga500-system.jpg into to tutorial-2 folder that was created when you unzipped the archive file tutorial-02.tar.gz. The reason that the image files are not part of the latter archive is that Website 50webs.com limits file sizes to 0.5 MB so files exceeding this size have to be downloaded separately.Question 2.2: Start Emacs and use the Ctrl-f command to open the file ~/.emacs in the editor. You can look at this file but do not touch it as it is used to initialise Emacs every time you start the editor. If you become proficient in using Emacs you might start editing this file, but for now you should just look at it and then close the file by pressing the key sequence Ctrl-x k or F3 to kill the file. See the following link for more information about how to operate Emacs.
Question 2.3: While you are still inside Emacs create a new text file in your home folder called hello.txt by pressing Ctrl-f and typing in the name hello.txt and then press Enter. Type some text and then quit Emacs by pressing the red close button at the top, right hand corner of the screen. Note that Emacs will save any unsaved files when you quit.
Question 2.4: Restart Emacs an reopen the file hello.txt by pressing F6 which brings up a Windows style file requester, and selecting the file. Then quit Emacs.
Question 2.5: Restart Emacs and reopen the file hello.txt that you saved in the previous question using Ctrl-f to locate the file. Verify that the file has the same contents as when you last edited it from the last question. Then quit Emacs.
Question 2.6: Restart Emacs and open your home directory (~/) into dired mode. By pressing the Up / Down cursor keys, locate the file hello.txt and open it by pressing enter.
To edit more than one file at the same time, simply Execute Ctrl-f to open a new file, or select a file using Dired mode. When you want to save all of your changes to disk, press F2 which will save all of the files that you are currently editing or F3 which will save and then purge all files that you have been editing.
You can switch files by browsing the Buffers Menu in the menu bar at the top of the screen. Note that in Emacs terminology, buffer means file. Advanced users should press the Insert or F12 button, which brings up a menu of all of the files that you are currently editing. You can browse this menu using Cursor-Up and Cursor-Down and you can press Enter or Insert or F12 to select a file. A special case for experts is the key sequence Insert Insert which switches back to the most recently edited file in Emacs. This is useful when you are doing some non work-related activity and your boss comes to make sure that you are working. By switching quickly from a non work-related file to a work-related file you can give the impression that you are working when in fact you are doing something else!
When you want to save and purge all files, for example when you have been editing a large number of files, simply press F3.
Question 2.7: Open the files tutorial-2/page1.html and tutorial-2/page2.html in Emacs and practice switching between these two files using the above-mentioned keys and menu buttons.
Hyperlinks take the following form: <a href="LINK_HREF">LINK_NAME</a>, where LINK_HREF is the name of the file that you wish to link to and LINK_NAME is the name of the link that appears in your Web browser.
Question 2.8: Add a hyperlink to page1.html by linking to page2.html and then add another hyperlink to page2.html linking to page1.html. Then open either page into a Web browser and practice clicking on the links that you have just created for navigating between to two Web pages.
Question 2.9: Add a fake hyperlink to page1.html. A fake hyperlink should look exactly like a real one but should not respond to a mouse click. To create a fake hyperlink you need to use the <font> . . . </font> pair of tags to get blue text and the <u> . . . </u> pair of tags to generate the underlined text. Now that you have learnt this trick, be aware that it can only be used for evil purposes.
Once you have progressed this far with hyperlinks, it is natural to ask, how do I link to a section inside an H.T.M.L. document? First inside the Web page x.html you will need to label the section that you want to link to using the following H.T.M.L. tags: <a name="NAME"></a>, where NAME is the name of the link that you wish to link to. Secondly you will need to create a link to that by adding the following code to a file y.html: <a href=x.html#NAME> . . . </a>. Note the use of the hash (#) character to separate the Web page name from the NAME section.
Question 2.10: Add a <a name="NAME"> tag to somewhere in the file page2.html. To create the link to this name, add the following tag to page1.html: <a href="page2.html#NAME">LINK_NAME</a> where LINK_NAME is the name of the link that shows up in the Web page in a Web browser. Check that the link works by clicking on the link with your Web browser pointed to the page page1.html.
Up until now you have only been using relative links, because the page that you have been linking to reside on the same file system (e.g. the C:\ drive) as the Web page that contains the link. The opposite of this is called an absolute link, whose href= begins with http://. This kind of link is assumed to link to a Web page on the Internet.
Question 2.11: Add an absolute link in page1.html to the Website www.google.com. Ask Davin if you cannot do this. Open page1.html in a Web browser and click on the link that you have just created to verify that the link works okay. When you have successfully achieved this then try adding an absolute link to a different site on the Internet, where the target of the link and the name of the link is left for you to decide.
Here is a brief list of the four main image file formats that you will use in your time as a Web designer:
Images in H.T.M.L. are achieved using the following basic syntax: <img src="SRC" width="WIDTH" height="HEIGHT">. The value for SRC specifies the location of the image, which is absolute is absolute if SRC begins with http:// and relative if SRC does not begin with http://. The values of WIDTH and HEIGHT are optional and are used to display the image on a Web page. Despite the fact that the WIDTH and HEIGHT values are optional, you should always give them so that the Web browser can display the page as it should look before all of the images in the page are finished loading. If you do not do this, the Web page will suddenly change every time an image has finished loading, which looks ugly.
If the actual dimensions of the image are smaller than the dimensions that you give for the width= and height= attributes, then the image will be scaled up and if the actual dimensions of the image are larger than the dimensions that you give for the width= and height= attributes then the image will be scaled down. For the best cosmetic result the dimensions that you give should be identical to the dimensions of the image.
Another way to link to images is to have hyperlinks that point to images, like so: <a href="SRC"><img src="IMAGE"></a>. Using this technique you can make images appear when you click on the hyperlink. This technique is useful when you have a small version (e.g. FOO-small.jpg) and a larger version (e.g. FOO-large.jpg) of the same image. You can imbed the smaller image on a Web page and have the large image come up when you click on the small image. Here is some H.T.M.L. code which will do the trick:
<a href="FOO-large.jpg"><img src="FOO-small.jpg"></a>
See Question 2.21 for how to do this.
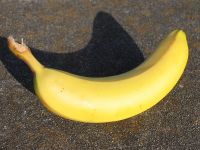
Question 2.12: Open the file banana.jpg in IrfanView by one of two ways: Open a Windows Explorer window in the folder tutorial-2 and double click on the file banana.jpg or open the folder tutorial-2 in Emacs's Dired mode, move the cursor to the file banana.jpg and finally press Enter on this file.
Question 2.13: Create a hyperlink to the image banana.jpg on the page page1.html.
Question 2.14: Once you have opened the image in IrfanView, press I to get information about the image. For the next question you will need to find out the width and height of the image.
Question 2.15: You should now use the <img> tag to create an image of the file banana.jpg on the page page1.html. Use the width and height values you obtained from the previous question.
Given the image banana.jpg there are three possible alignments that you can give it: left, right and center. Here is an example of the left alignment:
|
<img src="banana.jpg" width=200 height=150 align=left>

Blah Blah Blah Blah Blah Blah Blah Blah Blah Blah Blah
Blah Blah Blah Blah Blah Blah Blah Blah Blah Blah Blah
Blah Blah Blah Blah Blah Blah Blah Blah Blah Blah Blah
Blah Blah Blah Blah Blah Blah Blah Blah Blah Blah Blah
Blah Blah Blah Blah Blah Blah Blah Blah Blah Blah Blah
Blah Blah Blah Blah Blah Blah Blah Blah Blah Blah Blah
Blah Blah Blah Blah Blah Blah Blah Blah Blah Blah Blah
Blah Blah Blah Blah Blah Blah Blah Blah Blah Blah Blah
Blah Blah Blah Blah Blah Blah Blah Blah Blah Blah Blah
Blah Blah Blah Blah Blah Blah Blah Blah Blah Blah Blah
Blah Blah Blah Blah Blah Blah Blah Blah Blah Blah Blah
Blah Blah Blah Blah Blah Blah Blah Blah Blah Blah Blah
Blah Blah Blah Blah Blah Blah Blah Blah Blah Blah Blah
Blah Blah Blah Blah Blah Blah Blah Blah Blah Blah Blah
Blah Blah Blah Blah Blah Blah Blah Blah Blah Blah Blah
Blah Blah Blah Blah Blah Blah Blah Blah Blah Blah Blah
|
|
| The code in Emacs. | The code in a Web browser. |
You might notice that the border around the image is too narrow. To bypass this defect you need to use the hspace= and vspace= attributes like so:
|
<img src="banana.jpg" width=200 height=150 align=left
hspace=20 vspace=20>

Blah Blah Blah Blah Blah Blah Blah Blah Blah Blah Blah
Blah Blah Blah Blah Blah Blah Blah Blah Blah Blah Blah
Blah Blah Blah Blah Blah Blah Blah Blah Blah Blah Blah
Blah Blah Blah Blah Blah Blah Blah Blah Blah Blah Blah
Blah Blah Blah Blah Blah Blah Blah Blah Blah Blah Blah
Blah Blah Blah Blah Blah Blah Blah Blah Blah Blah Blah
Blah Blah Blah Blah Blah Blah Blah Blah Blah Blah Blah
Blah Blah Blah Blah Blah Blah Blah Blah Blah Blah Blah
Blah Blah Blah Blah Blah Blah Blah Blah Blah Blah Blah
Blah Blah Blah Blah Blah Blah Blah Blah Blah Blah Blah
Blah Blah Blah Blah Blah Blah Blah Blah Blah Blah Blah
Blah Blah Blah Blah Blah Blah Blah Blah Blah Blah Blah
Blah Blah Blah Blah Blah Blah Blah Blah Blah Blah Blah
Blah Blah Blah Blah Blah Blah Blah Blah Blah Blah Blah
Blah Blah Blah Blah Blah Blah Blah Blah Blah Blah Blah
Blah Blah Blah Blah Blah Blah Blah Blah Blah Blah Blah
|
|
| The code in Emacs. | The code in a Web browser. |
Here is an example of the right alignment:
|
<img src="banana.jpg" width=200 height=150 align=right
hspace=20 vspace=20>

Blah Blah Blah Blah Blah Blah Blah Blah Blah Blah Blah
Blah Blah Blah Blah Blah Blah Blah Blah Blah Blah Blah
Blah Blah Blah Blah Blah Blah Blah Blah Blah Blah Blah
Blah Blah Blah Blah Blah Blah Blah Blah Blah Blah Blah
Blah Blah Blah Blah Blah Blah Blah Blah Blah Blah Blah
Blah Blah Blah Blah Blah Blah Blah Blah Blah Blah Blah
Blah Blah Blah Blah Blah Blah Blah Blah Blah Blah Blah
Blah Blah Blah Blah Blah Blah Blah Blah Blah Blah Blah
Blah Blah Blah Blah Blah Blah Blah Blah Blah Blah Blah
Blah Blah Blah Blah Blah Blah Blah Blah Blah Blah Blah
Blah Blah Blah Blah Blah Blah Blah Blah Blah Blah Blah
Blah Blah Blah Blah Blah Blah Blah Blah Blah Blah Blah
Blah Blah Blah Blah Blah Blah Blah Blah Blah Blah Blah
Blah Blah Blah Blah Blah Blah Blah Blah Blah Blah Blah
Blah Blah Blah Blah Blah Blah Blah Blah Blah Blah Blah
Blah Blah Blah Blah Blah Blah Blah Blah Blah Blah Blah
|
|
| The code in Emacs. | The code in a Web browser. |
Here is an example of the center alignment. Note that you need to you the <center> . . . </center> tags that you learned about in Section § 1.6 rather then give the argument of align=center to the <img> tag, which would be invalid H.T.M.L..
|
<center>
  <img src="banana.jpg" width=200 height=150 vspace=20>
</center>

Blah Blah Blah Blah Blah Blah Blah Blah Blah Blah Blah
Blah Blah Blah Blah Blah Blah Blah Blah Blah Blah Blah
Blah Blah Blah Blah Blah Blah Blah Blah Blah Blah Blah
Blah Blah Blah Blah Blah Blah Blah Blah Blah Blah Blah
Blah Blah Blah Blah Blah Blah Blah Blah Blah Blah Blah
Blah Blah Blah Blah Blah Blah Blah Blah Blah Blah Blah
Blah Blah Blah Blah Blah Blah Blah Blah Blah Blah Blah
Blah Blah Blah Blah Blah Blah Blah Blah Blah Blah Blah
Blah Blah Blah Blah Blah Blah Blah Blah Blah Blah Blah
Blah Blah Blah Blah Blah Blah Blah Blah Blah Blah Blah
Blah Blah Blah Blah Blah Blah Blah Blah Blah Blah Blah
Blah Blah Blah Blah Blah Blah Blah Blah Blah Blah Blah
Blah Blah Blah Blah Blah Blah Blah Blah Blah Blah Blah
Blah Blah Blah Blah Blah Blah Blah Blah Blah Blah Blah
Blah Blah Blah Blah Blah Blah Blah Blah Blah Blah Blah
Blah Blah Blah Blah Blah Blah Blah Blah Blah Blah Blah
|
|
| The code in Emacs. | The code in a Web browser. |
Question 2.16: You should now add image links copying each of the previous four examples to your page page1.html and see if they show up correctly in a Web browser.
If a link pointed to by an href= or a src= does not exist, it is called a broken link. When you have a lot of H.T.M.L. files with a lot of hyperlinks you can use Emacs to find broken links for you without having to painstakingly search through all of your H.T.M.L. files manually. The Emacs command for this is Alt-x testlinks Enter, at which point Emacs will ask you what folder you wish to use for the broken links search.
Question 2.17: You should do this now to make sure that the two Web pages page1.html and page2.html do not contain any broken links. Note that the testlinks command is not able to find broken links whose href= or src= attributes are absolute, i.e. begins with http://.
IrfanView is a general purpose image viewing and format conversion program. However IrfanView lacks any ability to manually edit images. For this purpose you should use MS Paint. Advanced graphics designers will probably use Adobe Photoshop or its open-source equivalent, GIMP. For the purposes of this course we will not bother with either of these two programs as they require a lot to learn how to use them, and you can get by in the Web design field using the simpler programs IrfanView and MS Paint.
Create an image now in MS Paint and link to it from one of your Web pages page1.html or page2.html. Note that MS Paint is not very good at saving images in the GIF or PNG format. For this purpose you should use IrfanView. Therefore your image editing process for non-photographic images should take two steps:
Question 2.18: You should now create an image link to the image seanpool.bmp in you Web page page1.html. First you wil need to use IrfanView to convert the image to GIF, PNG or JPG format. It is left up to you to decide which file format is more appropriate. First open seanpool.bmp in IrfanView and use the I key to find out the image width and height. Then use these values to write an image tag in page1.html. Finally open the page page1.html in a Web browser to verify that the picture of Sean (my Nephew) is correctly displayed on the Web page.
Question 2.19: Do the same as above for the file New-Zealand.bmp. Is it okay to use the same file format as the previous question?
Question 2.20: Find an animated GIF from the Internet and save it to disk for the purposes of showing on one of your Web pages. Try googling for Free Animated GIF's or click here if you cannot be bothered doing this.
Question 2.21: Another task for you to try is adding an image using the file Amiga500-system.jpg a picture of the now obsolete Amiga 500 home computer. If you open this file in IrfanView you will notice that the file size is huge. To show this image you have two choices, the first way is to simply give small values for width= and height= but if you do this on a Web page and show the page in a browser, it will look distorted because the Web browser's shrink feature is not accurate for such large reductions in size. It is also inefficient when displaying the image, because it requires the browser to load the entire contents of the huge image just to display a reduced version of it. The second, smarter way is to manually resize the image by about 1/4 and save it to disk with a file name something like Amiga500-system-reduced.jpg (so that the old huge file still exists on disk). Try both of these techniques now.
Question 2.22: Suppose that you want the user to be able to view the full-sized image by clicking on the smaller-sized image. To do this, you will need to wrap a hyperlink around the image like so:
<a href="Amiga500-system.jpg"><img src="Amiga500-system-reduced.jpg" width=??? height=???></a>
where ??? is replaced by the width and height values of the
smaller image. Open the page in a Web browser and verify that you
can view the full-sized image by clicking on the smaller-sized
image.
Question 2.23: Now you have mastered hyperlinks and images in H.T.M.L., experiment with adding some of your own photos to some Web pages that you create yourself from scratch. Copy the patterns established in the files page1.html and page2.html. If you don't have any of your own images, use the images present in the tar file associated with this tutorial.
If you display a textual email address in your Website, it can be used by spammers to send spam to your email address. To get around this, you need to display your email address as an image. For example, to display the email address your.name@example.com, you need to create an H.T.M.L. file with the following contents:
<font size=7><code>your.name@example.com</code></font>
|
Then you should open the file in a Web browser and press the
PrintScreen button. Then open IrfanView and select Edit ->
Paste. This will show the email address as an image. Then drag
the mouse over the email address with the left mouse button held
down and select Edit -> Crop selection. This will crop the
image to just the email address. If the email address text is too
large then you might need to scale it down with the mouse menu item
Image -> Resize/Resample.... To save the email address to
an image file, select File -> Save As... and save the image
as either an GIF or PNG format image. Suppose you saved the
file as nospam.png. Then to show the email address on a Web
page, add the following tag to the H.T.M.L. document that you want to
show the email address on:
<img src="nospam.png width=??? height=???>
where the values ??? for width and height correspond to the
width and height of the image. To find the values of width and
height, open the image in IrfanView and select Image ->
Information...
Question 2.24: Try adding your email address as an image to a Web page and check that it shows up on a Web browser.
By adding a background= attribute to the <body> tag you can display an image as the background of your Web page.
Question 2.25: Try doing this now using one of the images that have been given to you.
To get more features in how the background image is displayed, see sections Section § 7.10.5 or Section § 9.4.5.
To upload a Website containing H.T.M.L. and image file to the Ripway
Web host, you will need to visit www.50webs.com and create
an account. When you have done this you will need to press the
and create
an account. When you have done this you will need to press the
To upload a Website containing H.T.M.L. and image file to the
50webs.com Web host, you will need to visit
www.50webs.com and create an account. When you have done
this you will need to use the program FTP to upload your files.
Ask Davin for more information on how to do this.
Question 2.26: Try uploading the Website that you have created in this tutorial to 50webs.com. When you have finished uploading your Website, you should browse the pages of your Website so that you can be sure than all of the files were uploaded successfully.
| Back to Web Design Course |
|
This page has the following hit count:
|
